# home was on /dev/sda9 during installation UUID=9a1eabc7-17ef-4033-ae61-48549c0f1483 /home ext4 defaults 0 0
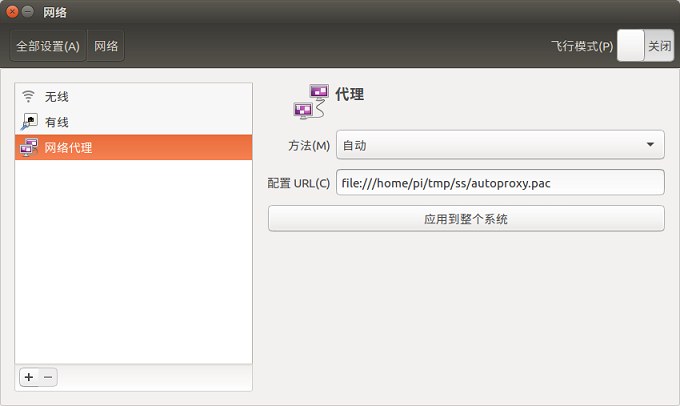
例如我修改后的,然后保存,重启。
1 2 3 4 5 6 7 8 9 10 11 12 13
# /etc/fstab: static file system information.
#
# Use 'blkid' to print the universally unique identifier for a
# device; this may be used with UUID= as a more robust way to name devices
# that works even if disks are added and removed. See fstab(5).
#
# <file system> <mount point>   <type>  <options>       <dump>  <pass>
# / was on /dev/sda3 during installation
UUID=57006982-8ad1-442f-a7d6-c56ee2e68306 /               ext4    errors=remount-ro 0       1
# swap was on /dev/sda8 during installation
UUID=43060bdb-2b29-424f-88b7-84ad64de7851 none            swap    sw              0       0
# home was on /dev/sda9 during installation
UUID=9a1eabc7-17ef-4033-ae61-48549c0f1483 /home           ext4    defaults 	0       0
## 中国的骨干源
deb http://cn.archive.ubuntu.com/ubuntu/ trusty main restricted universe multiverse
deb http://cn.archive.ubuntu.com/ubuntu/ trusty-backports main restricted universe multiverse
deb http://cn.archive.ubuntu.com/ubuntu/ trusty-proposed main restricted universe multiverse

deb-src http://cn.archive.ubuntu.com/ubuntu/ trusty main restricted universe multiverse
deb-src http://cn.archive.ubuntu.com/ubuntu/ trusty-backports main restricted universe multiverse

## 阿里云
deb http://mirrors.aliyun.com/ubuntu trusty main restricted
deb-src http://mirrors.aliyun.com/ubuntu trusty main restricted
deb http://mirrors.aliyun.com/ubuntu trusty multiverse
deb-src http://mirrors.aliyun.com/ubuntu trusty multiverse
deb http://mirrors.aliyun.com/ubuntu trusty-updates multiverse
deb-src http://mirrors.aliyun.com/ubuntu trusty-updates multiverse
deb http://mirrors.aliyun.com/ubuntu trusty-backports main restricted universe multiverse
deb-src http://mirrors.aliyun.com/ubuntu trusty-backports main restricted universe multiverse
Generating grub.cfg ...
Found linux image: /boot/vmlinuz-2.6.32-22-generic-pae
Found initrd image: /boot/initrd.img-2.6.32-22-generic-pae
Found memtest86+ image: /boot/memtest86+.bin
Found Windows 7 (loader) on /dev/sda3
done