本步骤经笔者亲身实践,集百家所长,能实现Caffe在NVIDIA GPU下进行计算。

安装开发所需的依赖包

安装开发所需要的一些基本包

1
2
3
sudo apt-get install build-essential  # basic requirement
sudo apt-get install vim cmake git # tools
sudo apt-get install libprotobuf-dev libleveldb-dev libsnappy-dev libopencv-dev libboost-all-dev libhdf5-serial-dev libgflags-dev libgoogle-glog-dev liblmdb-dev protobuf-compiler libatlas-base-dev #required by caffe

安装CUDA及驱动

准备工作

下文中所有资源可在百度云 链接:http://pan.baidu.com/s/1dEXPg3J 密码:v19o 得到。

在关闭桌面管理 lightdm 的情况下安装驱动似乎可以实现Intel 核芯显卡 来显示 + NVIDIA 显卡来计算。具体步骤如下:

  1. 首先在BIOS设置里选择用Intel显卡来显示或作为主要显示设备

  2. 进入Ubuntu, 按 ctrl+alt+F1 进入tty, 登录tty后输入如下命令

    1
    sudo service lightdm stop

该命令会关闭lightdm。如果你使用 gdm或者其他的desktop manager, 请在安装NVIDIA驱动前关闭他。

下载deb包及安装CUDA

使用deb包安装CUDA及驱动能省去很多麻烦(参见CUDA Starting Guide)。下载对应于你系统的CUDA deb包, 然后用下列命令添加软件源

1
2
sudo dpkg -i cuda-repo-<distro>_<version>_<architecture>.deb
sudo apt-get update

然后用下列命令安装CUDA

1
sudo apt-get install cuda

安装完成后 reboot.

1
sudo reboot

安装cuDNN

(03-25: 今天下最新的caffe回来发现编译不过啊一直CUDNN报错浪费了我几个小时没搞定! 后来才发现caffe15小时前的更新开始使用cudnn v2, 但是官网上并没有明显提示!!! 坑爹啊!)
cuDNN能加速caffe中conv及pooling的计算。首先下载cuDNN,需要注册。或通过在百度云 链接:http://pan.baidu.com/s/1dEXPg3J 密码:v19o 得到。
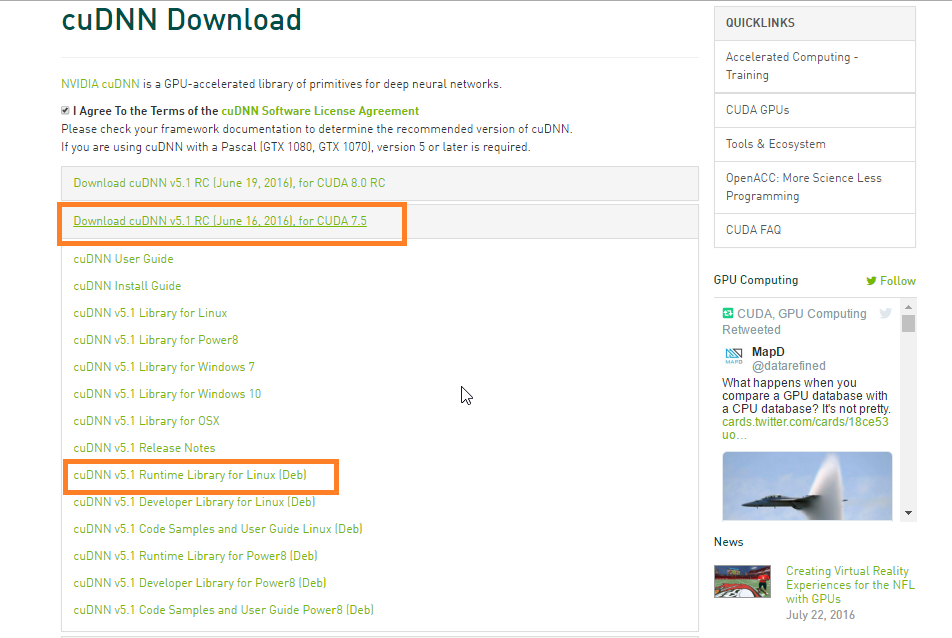
![](/images/research/caffe/cuDNN Download.png)

下载完成后,然后执行下列命令解压并安装

1
2
3
4
5
# 需注意,切换到你自己存放 cudnn-7.5-linux-x64-v5.1-rc.tgz 文件的文件夹下进行解压
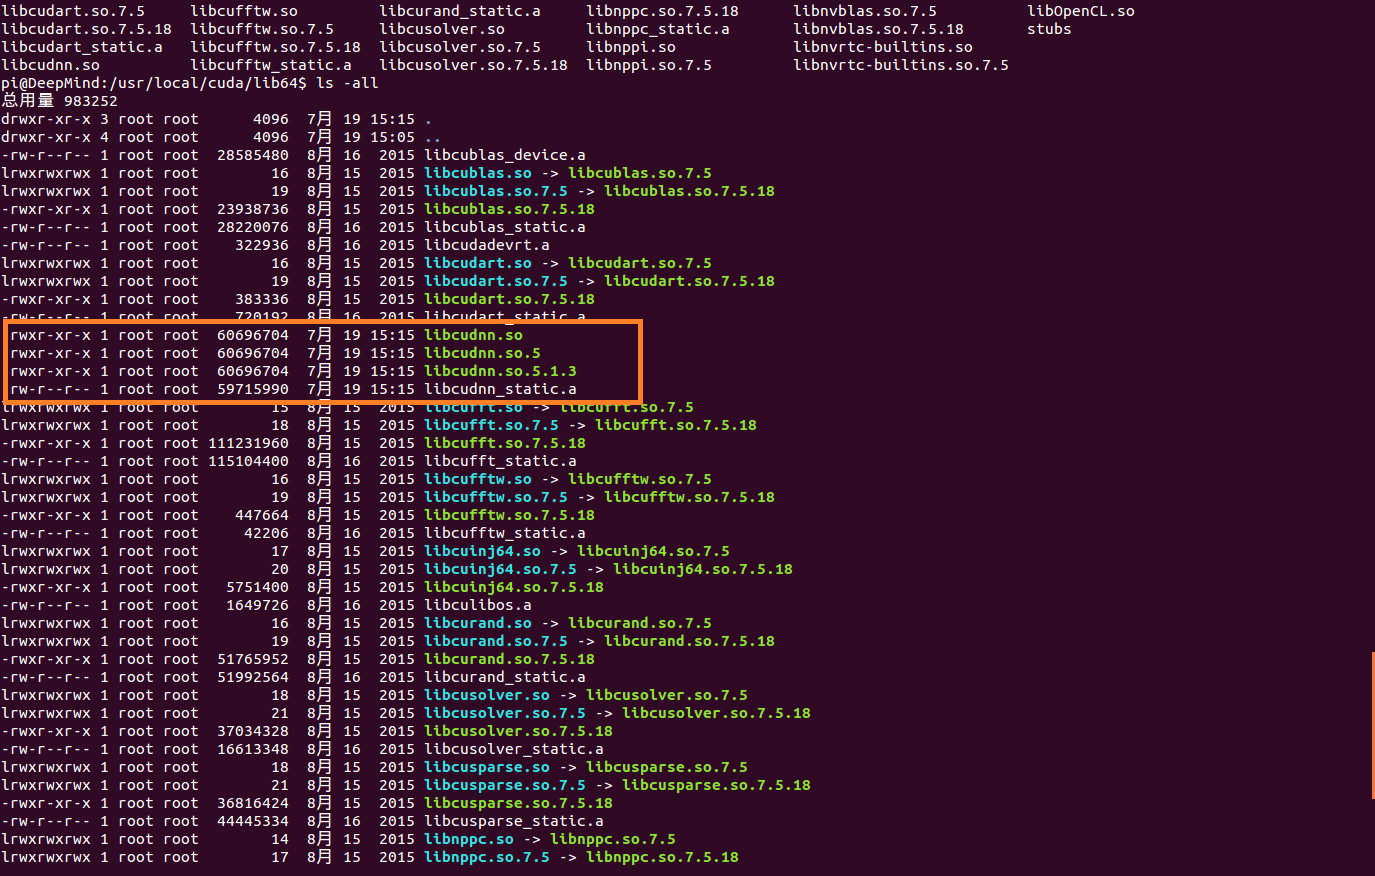
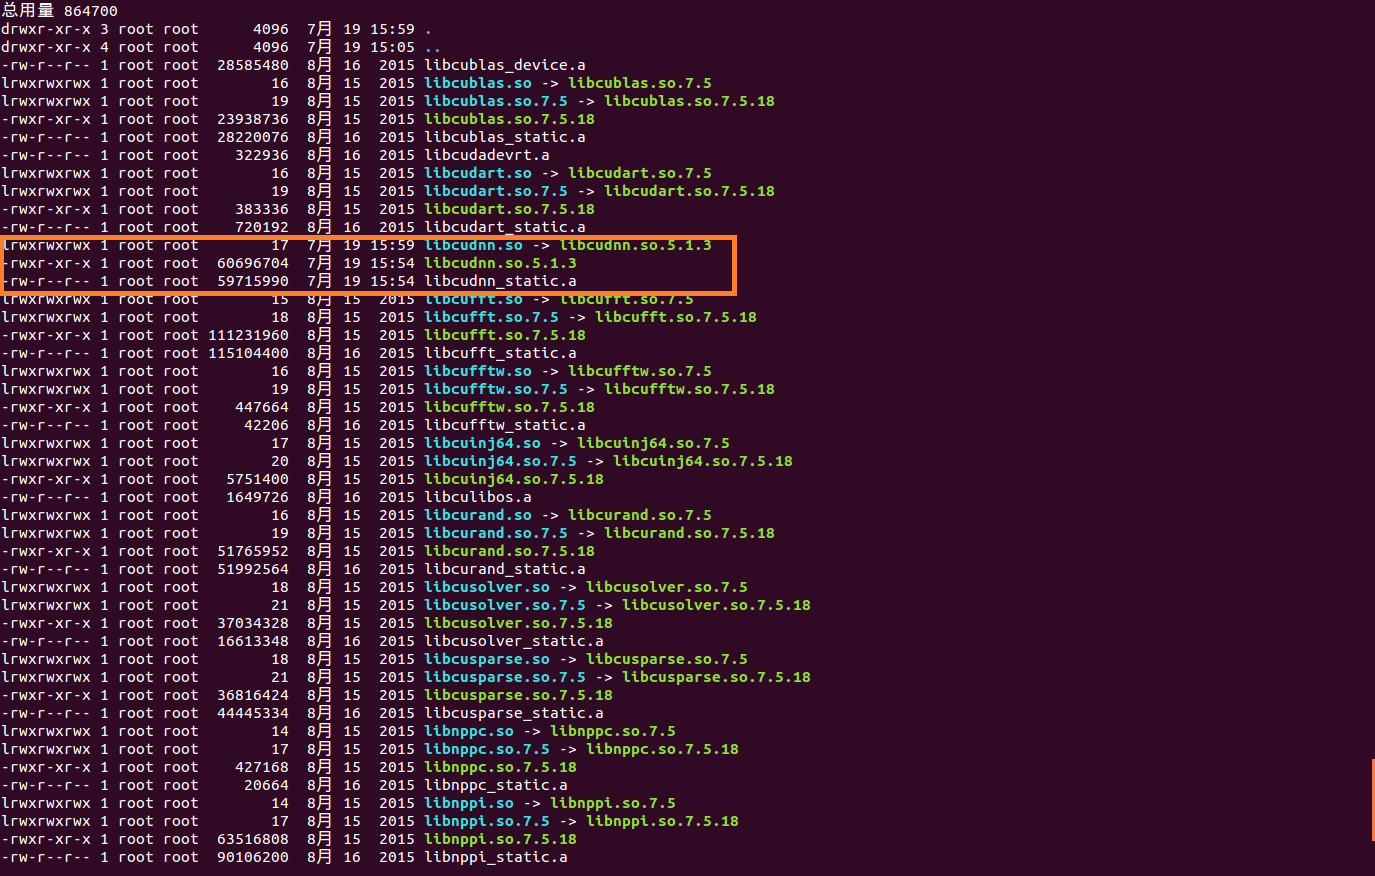
tar -zxvf cudnn-7.5-linux-x64-v5.1-rc.tgz
cd cuda
sudo cp lib64/* /usr/local/cuda/lib64/
sudo cp include/cudnn.h /usr/local/cuda/include/


更新软链接

1
2
3
cd /usr/local/cuda/lib64/
sudo rm -rf libcudnn.so libcudnn.so.5
sudo ln -s libcudnn.so.5.1.3 libcudnn.so

设置环境变量

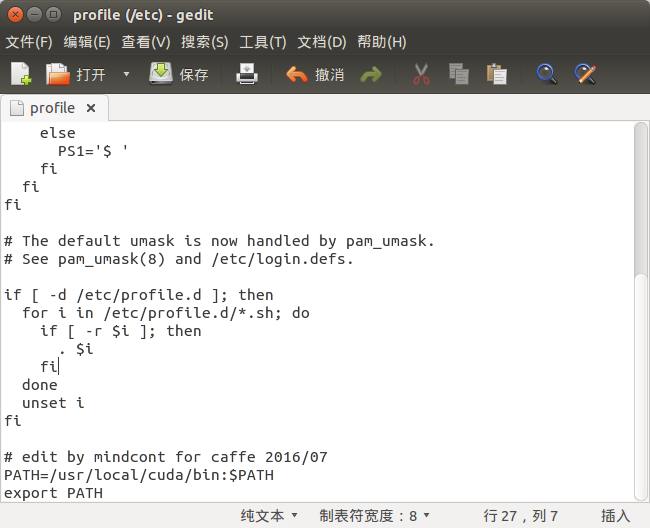
安装完成后需要在/etc/profile中添加环境变量,

1
sudo gedit /etc/profile

在文件最后添加:

1
2
PATH=/usr/local/cuda/bin:$PATH
export PATH


保存后, 执行下列命令, 使环境变量立即生效

1
source /etc/profile

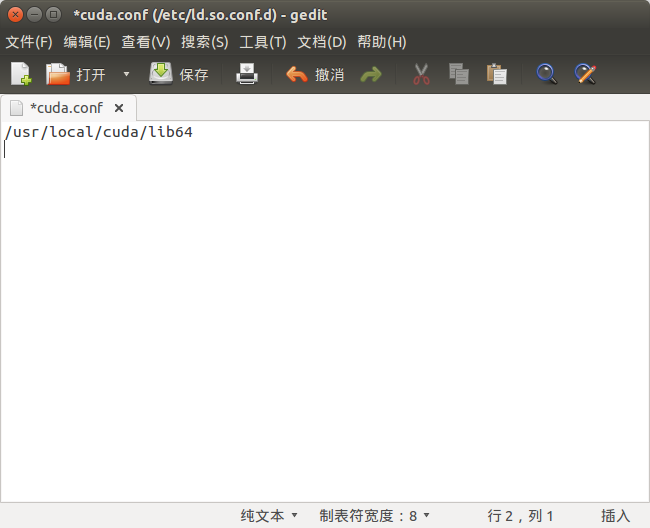
同时需要添加lib库路径: 在 /etc/ld.so.conf.d/加入文件 cuda.conf, 内容如下

1
/usr/local/cuda/lib64


保存后,执行下列命令使之立刻生效

1
sudo ldconfig

测试CUDA

进入/usr/local/cuda/samples, 执行下列命令来build samples

1
sudo make all -j4

编译过程

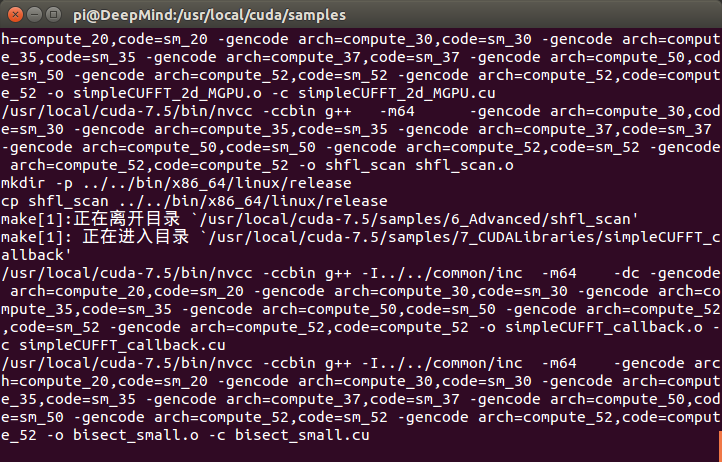
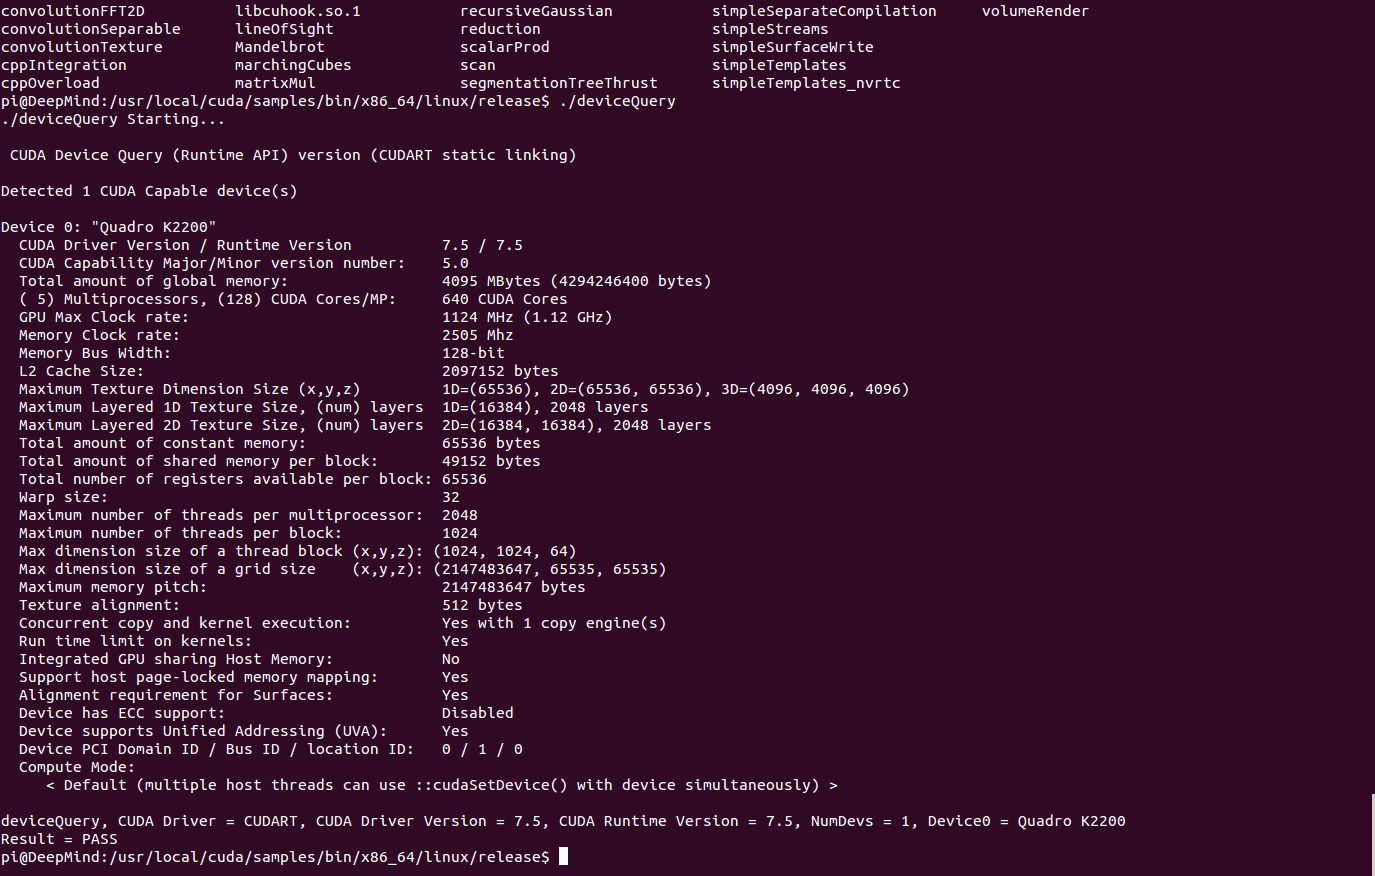
整个过程大概10分钟左右, 全部编译完成后, 进入 samples/bin/x86_64/linux/release, 运行deviceQuery

1
./deviceQuery

如果出现显卡信息, 则驱动及显卡安装成功:

1
2
3
4
5
6
7
8
9
10
11
12
13
14
15
16
17
18
19
20
21
22
23
24
25
26
27
28
29
30
31
32
33
34
35
36
37
38
39
40
41
42
43
pi@DeepMind:/usr/local/cuda/samples/bin/x86_64/linux/release$ ./deviceQuery
./deviceQuery Starting...

CUDA Device Query (Runtime API) version (CUDART static linking)

Detected 1 CUDA Capable device(s)

Device 0: "Quadro K2200"
CUDA Driver Version / Runtime Version 7.5 / 7.5
CUDA Capability Major/Minor version number: 5.0
Total amount of global memory: 4095 MBytes (4294246400 bytes)
( 5) Multiprocessors, (128) CUDA Cores/MP: 640 CUDA Cores
GPU Max Clock rate: 1124 MHz (1.12 GHz)
Memory Clock rate: 2505 Mhz
Memory Bus Width: 128-bit
L2 Cache Size: 2097152 bytes
Maximum Texture Dimension Size (x,y,z) 1D=(65536), 2D=(65536, 65536), 3D=(4096, 4096, 4096)
Maximum Layered 1D Texture Size, (num) layers 1D=(16384), 2048 layers
Maximum Layered 2D Texture Size, (num) layers 2D=(16384, 16384), 2048 layers
Total amount of constant memory: 65536 bytes
Total amount of shared memory per block: 49152 bytes
Total number of registers available per block: 65536
Warp size: 32
Maximum number of threads per multiprocessor: 2048
Maximum number of threads per block: 1024
Max dimension size of a thread block (x,y,z): (1024, 1024, 64)
Max dimension size of a grid size (x,y,z): (2147483647, 65535, 65535)
Maximum memory pitch: 2147483647 bytes
Texture alignment: 512 bytes
Concurrent copy and kernel execution: Yes with 1 copy engine(s)
Run time limit on kernels: Yes
Integrated GPU sharing Host Memory: No
Support host page-locked memory mapping: Yes
Alignment requirement for Surfaces: Yes
Device has ECC support: Disabled
Device supports Unified Addressing (UVA): Yes
Device PCI Domain ID / Bus ID / location ID: 0 / 1 / 0
Compute Mode:
< Default (multiple host threads can use ::cudaSetDevice() with device simultaneously) >

deviceQuery, CUDA Driver = CUDART, CUDA Driver Version = 7.5, CUDA Runtime Version = 7.5, NumDevs = 1, Device0 = Quadro K2200
Result = PASS

安装Intel MKL 或Atlas

如果没有Intel MKL, 可以用下列命令安装免费的atlas

1
sudo apt-get install libatlas-base-dev

如果有mkl安装包Intel® MKL需注册后会发下载链接和激活码到注册邮箱。
先注册,后再登录到此界面,选择’Get This Library for Free!’->’Everyone’。
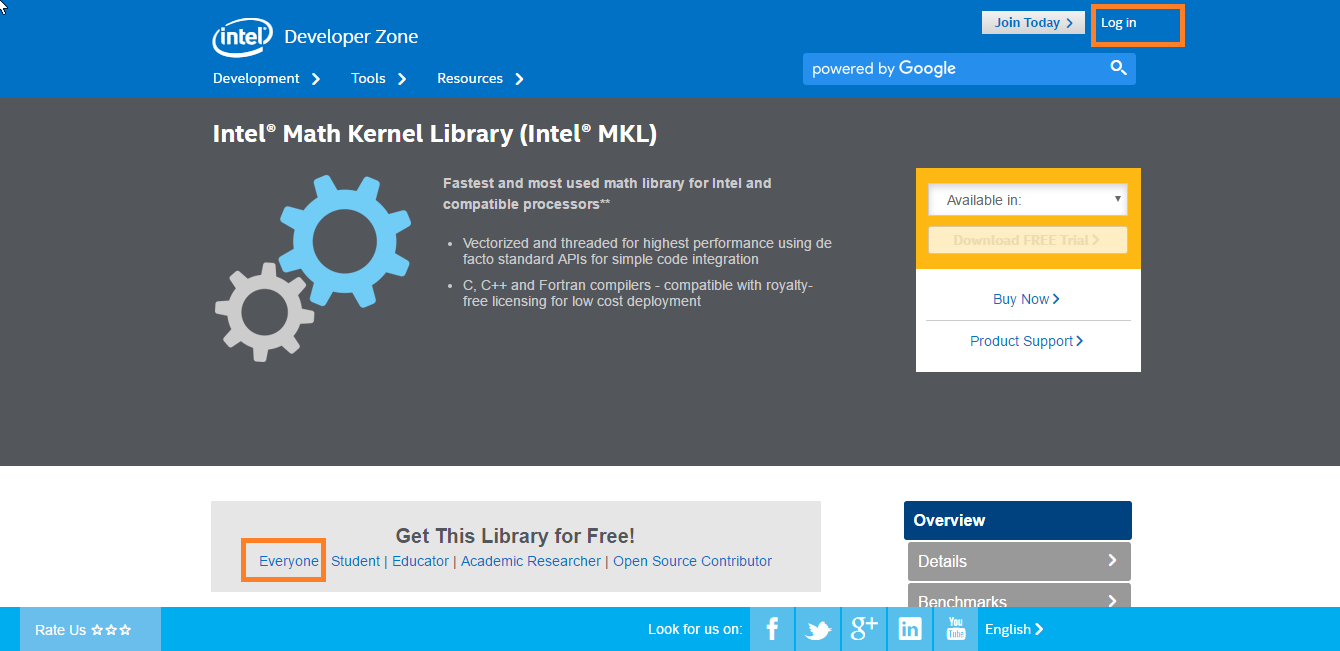
选择社区版本Licensing

填写信息后,会下载链接和激活码到你注册邮箱。

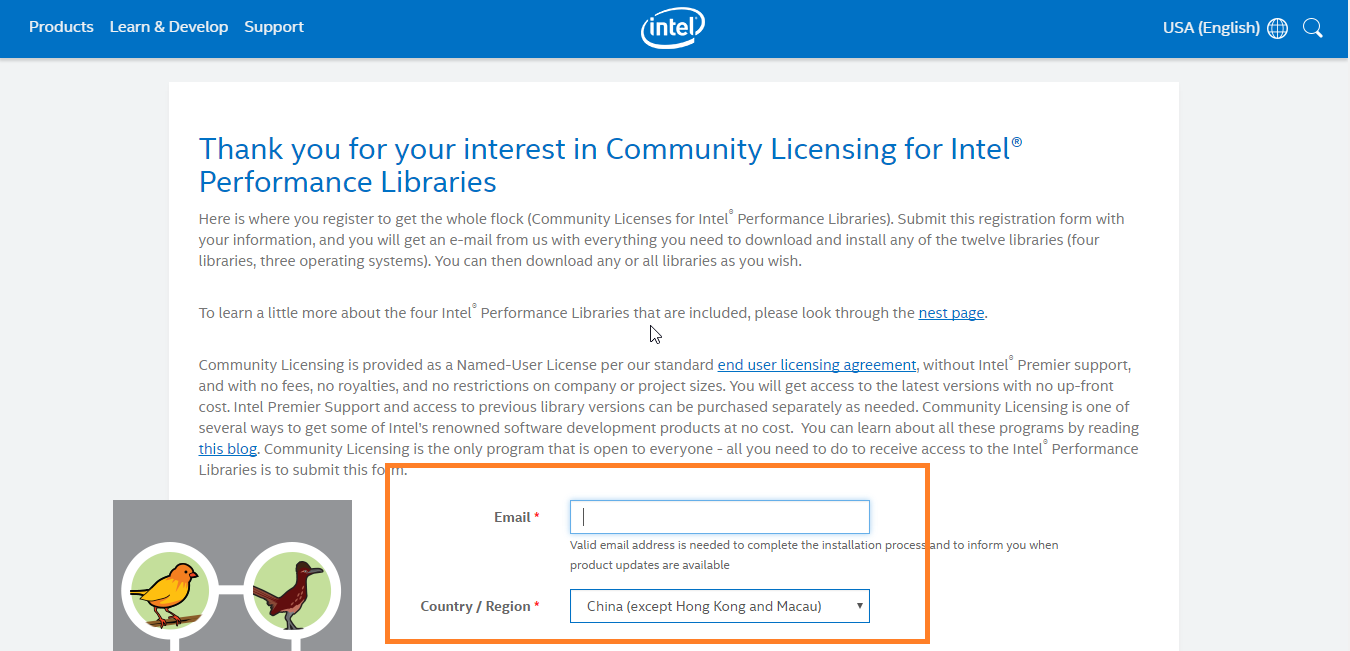
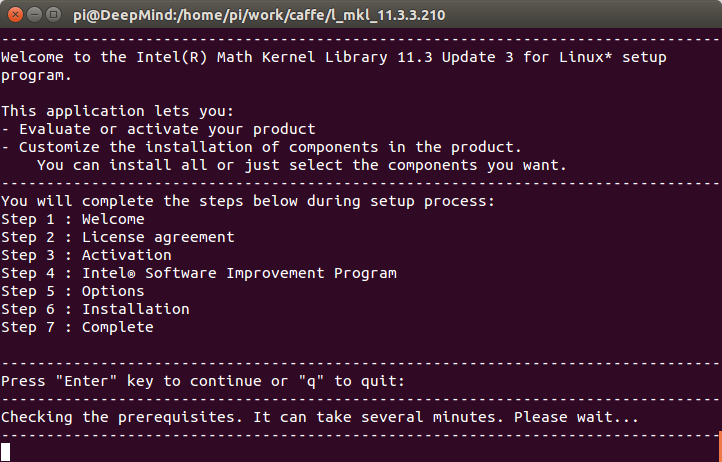
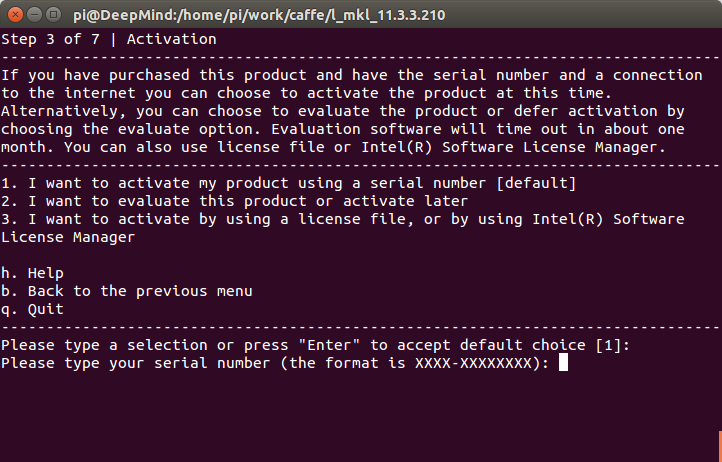
首先解压安装包,下面有一个install_GUI.sh文件, 执行该文件,会出现图形安装界面,根据说明一步一步执行即可。

1
2
3
tar -zxvf l_mkl_11.3.3.210.tgz
cd l_mkl_11.3.3.210
sudo sh install.sh


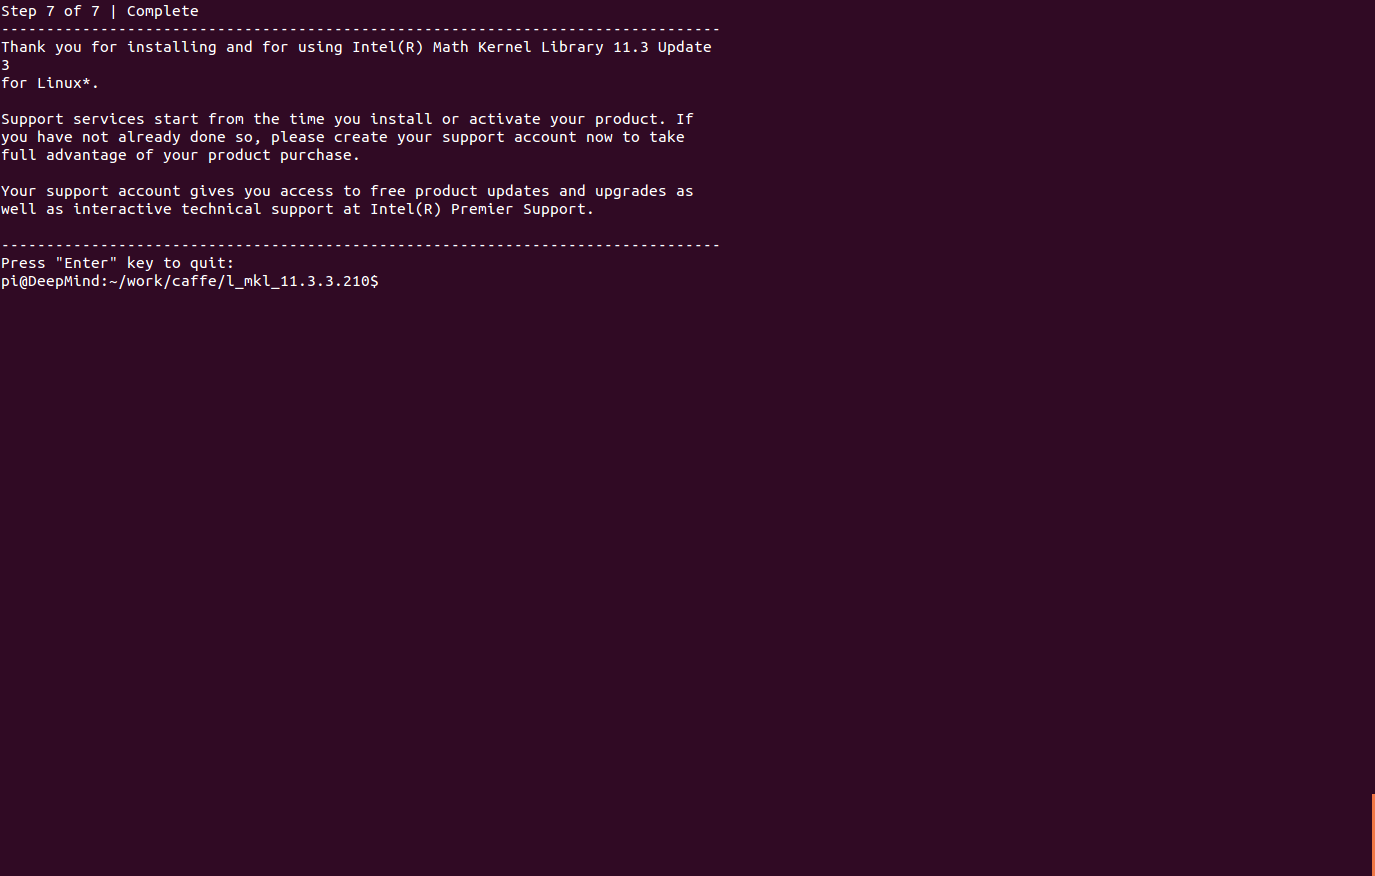
注意: 安装完成后需要添加library路径, 创建/etc/ld.so.conf.d/intel_mkl.conf文件, 在文件中添加内容

1
2
/opt/intel/lib/intel64
/opt/intel/mkl/lib/intel64


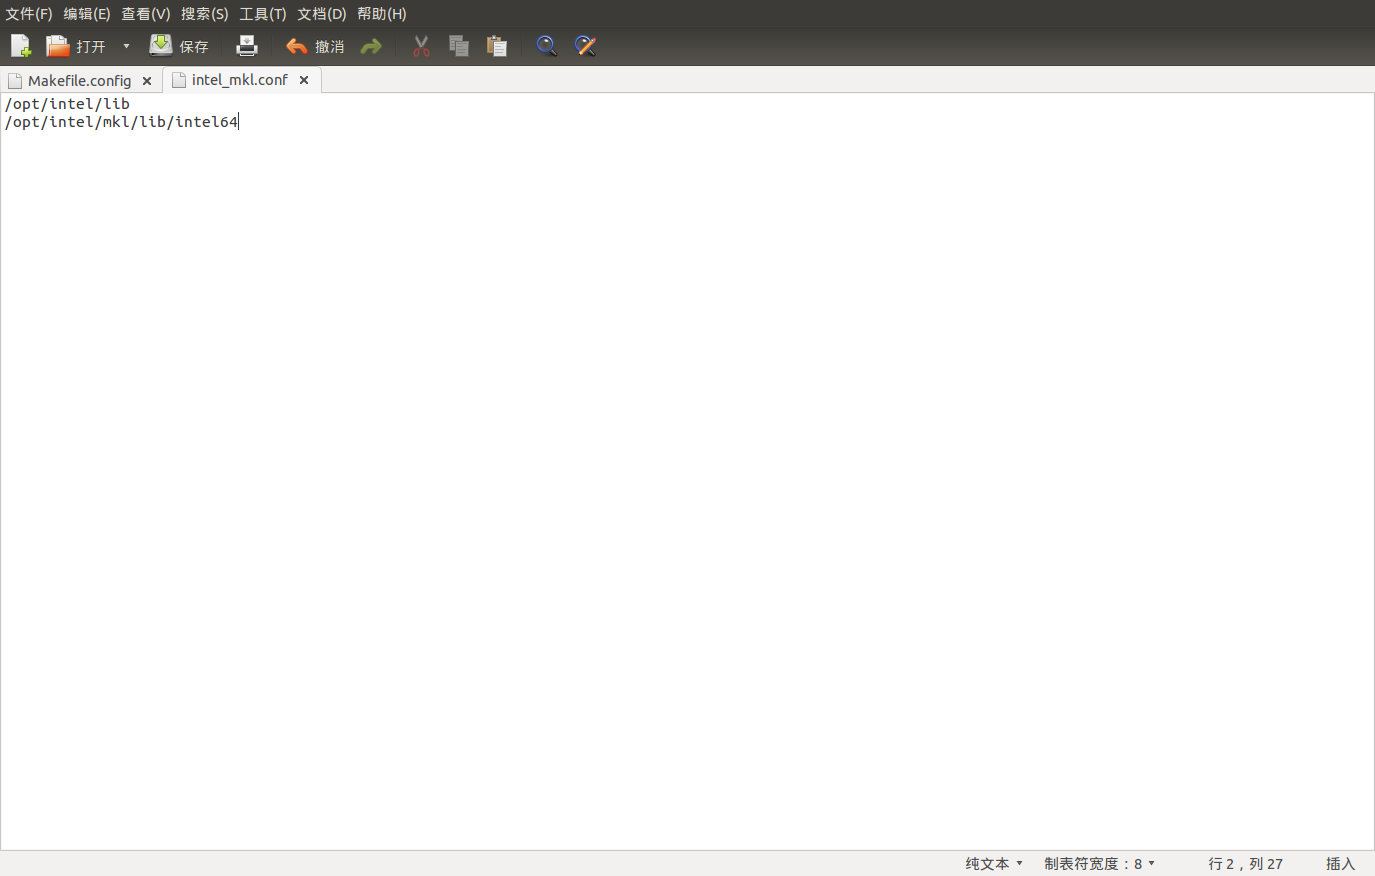
注意把路径替换成自己的安装路径。 编辑完后执行

1
sudo ldconfig

安装OpenCV (Optional, 如果运行caffe时opencv报错, 可以重新按照此步骤安装)

参见我的另一篇博客Ubuntu 14.04安装 OpenCV 2.4.9

安装Caffe所需要的Python环境

1
2
sudo apt-get install python-numpy python-scipy python-matplotlib python-sklearn python-skimage python-h5py python-protobuf python-leveldb python-networkx python-nose python-pandas python-gflags Cython ipython python-pydot
sudo apt-get install protobuf-c-compiler protobuf-compiler

安装MATLAB

Caffe提供了MATLAB接口,有需要用MATLAB的同学可以额外安装MATLAB。安装教程同Windows 下类似,首先下载 MATLAB for Linux、解压。

1
sudo sh ./install.sh

弹出图形界面,之后同在Windows下一样进行破解激活。windows下安装和激活 Matlab参加我的另一篇博客Matlab连接Kinect V2 。安装完成后可添加图标

1
sudo vi /usr/share/applications/Matlab.desktop

输入以下内容

1
2
3
4
5
6
7
8
9
[Desktop Entry]
Type=Application
Name=Matlab
GenericName=Matlab R2015b
Comment=Matlab:The Language of Technical Computing
Exec=sh /usr/local/MATLAB/R2015b/bin/matlab -desktop
Icon=/usr/local/MATLAB/Matlab.png
Terminal=false
Categories=Development;Matlab;

这里我的Matlab安装位置为默认,如下所示
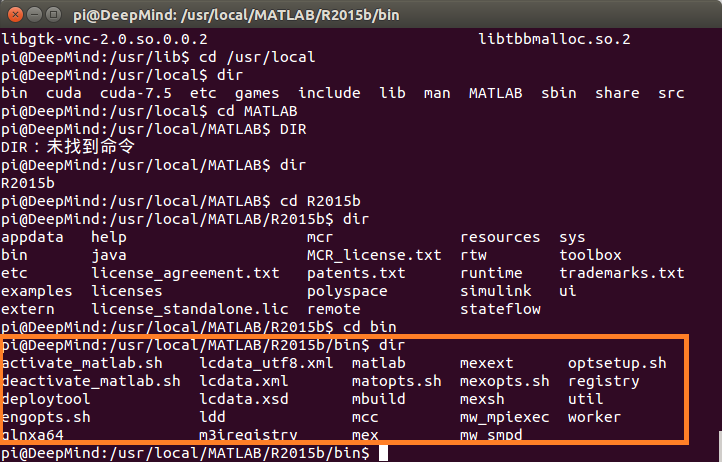
编译Caffe

编译主程序

终于完成了所有环境的配置,可以愉快的编译Caffe了!需要注意的是,这里我采用的是caffe-rc3.zip(on 30 Jan 2016)。 进入caffe根目录, 首先复制一份Makefile.config,

1
cp Makefile.config.example Makefile.config

然后修改里面的内容,主要需要修改的参数包括

  • CPU_ONLY 是否只使用CPU模式,没有GPU没安装CUDA的同学可以打开这个选项
  • BLAS (使用intel mkl还是atlas)
  • MATLAB_DIR 如果需要使用MATLAB wrapper的同学需要指定matlab的安装路径, 如我的路径为 /usr/local/MATLAB/R2015b (注意该目录下需要包含bin文件夹,bin文件夹里应该包含mex二进制程序)
  • DEBUG 是否使用debug模式,打开此选项则可以在eclipse或者NSight中debug程序
  • CUDA_ARCH 可根据你自己显卡对应的计算力改相应的 -gencode arch=compute_xx,code=compute_xx 。例如我的显卡是 NVIDIA K2200 对应的计算力是 5.0,所以我相应的设置为 -gencode arch=compute_50,code=compute_50

这里是我的配置:

1
2
3
4
5
6
7
8
9
10
11
12
13
14
15
16
17
18
19
20
21
22
23
24
25
26
27
28
29
30
31
32
33
34
35
36
37
38
39
40
41
42
43
44
45
46
47
48
49
50
51
52
53
54
55
56
57
58
59
60
61
62
63
64
65
66
67
68
69
70
71
72
73
74
75
76
77
78
79
80
81
82
83
84
85
86
87
88
89
90
91
92
93
94
95
96
97
98
99
100
101
102
103
104
105
106
107
108
109
## Refer to http://caffe.berkeleyvision.org/installation.html
# Contributions simplifying and improving our build system are welcome!

# cuDNN acceleration switch (uncomment to build with cuDNN).
USE_CUDNN := 1

# CPU-only switch (uncomment to build without GPU support).
# CPU_ONLY := 1

# uncomment to disable IO dependencies and corresponding data layers
USE_OPENCV := 1
USE_LEVELDB := 1
USE_LMDB := 1

# uncomment to allow MDB_NOLOCK when reading LMDB files (only if necessary)
# You should not set this flag if you will be reading LMDBs with any
# possibility of simultaneous read and write
# ALLOW_LMDB_NOLOCK := 1

# Uncomment if you're using OpenCV 3
# OPENCV_VERSION := 3

# To customize your choice of compiler, uncomment and set the following.
# N.B. the default for Linux is g++ and the default for OSX is clang++
# CUSTOM_CXX := g++

# CUDA directory contains bin/ and lib/ directories that we need.
CUDA_DIR := /usr/local/cuda
# On Ubuntu 14.04, if cuda tools are installed via
# "sudo apt-get install nvidia-cuda-toolkit" then use this instead:
# CUDA_DIR := /usr

# CUDA architecture setting: going with all of them.
# For CUDA < 6.0, comment the *_50 lines for compatibility.
CUDA_ARCH := -gencode arch=compute_50,code=sm_50 \
-gencode arch=compute_50,code=compute_50

# BLAS choice:
# atlas for ATLAS (default)
# mkl for MKL
# open for OpenBlas
BLAS := mkl
# Custom (MKL/ATLAS/OpenBLAS) include and lib directories.
# Leave commented to accept the defaults for your choice of BLAS
# (which should work)!
BLAS_INCLUDE := /opt/intel/mkl/include
BLAS_LIB := /opt/intel/mkl/lib/intel64 \
/opt/intel/lib/intel64

# Homebrew puts openblas in a directory that is not on the standard search path
# BLAS_INCLUDE := $(shell brew --prefix openblas)/include
# BLAS_LIB := $(shell brew --prefix openblas)/lib

# This is required only if you will compile the matlab interface.
# MATLAB directory should contain the mex binary in /bin.
MATLAB_DIR := /usr/local/MATLAB/R2015b
# MATLAB_DIR := /Applications/MATLAB_R2012b.app

# NOTE: this is required only if you will compile the python interface.
# We need to be able to find Python.h and numpy/arrayobject.h.
PYTHON_INCLUDE := /usr/include/python2.7 \
/usr/lib/python2.7/dist-packages/numpy/core/include
# Anaconda Python distribution is quite popular. Include path:
# Verify anaconda location, sometimes it's in root.
# ANACONDA_HOME := $(HOME)/anaconda
# PYTHON_INCLUDE := $(ANACONDA_HOME)/include \
# $(ANACONDA_HOME)/include/python2.7 \
# $(ANACONDA_HOME)/lib/python2.7/site-packages/numpy/core/include \

# Uncomment to use Python 3 (default is Python 2)
# PYTHON_LIBRARIES := boost_python3 python3.5m
# PYTHON_INCLUDE := /usr/include/python3.5m \
# /usr/lib/python3.5/dist-packages/numpy/core/include

# We need to be able to find libpythonX.X.so or .dylib.
PYTHON_LIB := /usr/lib
# PYTHON_LIB := $(ANACONDA_HOME)/lib

# Homebrew installs numpy in a non standard path (keg only)
# PYTHON_INCLUDE += $(dir $(shell python -c 'import numpy.core; print(numpy.core.__file__)'))/include
# PYTHON_LIB += $(shell brew --prefix numpy)/lib

# Uncomment to support layers written in Python (will link against Python libs)
# WITH_PYTHON_LAYER := 1

# Whatever else you find you need goes here.
INCLUDE_DIRS := $(PYTHON_INCLUDE) /usr/local/include
LIBRARY_DIRS := $(PYTHON_LIB) /usr/local/lib /usr/lib

# If Homebrew is installed at a non standard location (for example your home directory) and you use it for general dependencies
# INCLUDE_DIRS += $(shell brew --prefix)/include
# LIBRARY_DIRS += $(shell brew --prefix)/lib

# Uncomment to use `pkg-config` to specify OpenCV library paths.
# (Usually not necessary -- OpenCV libraries are normally installed in one of the above $LIBRARY_DIRS.)
# USE_PKG_CONFIG := 1

# N.B. both build and distribute dirs are cleared on `make clean`
BUILD_DIR := build
DISTRIBUTE_DIR := distribute

# Uncomment for debugging. Does not work on OSX due to https://github.com/BVLC/caffe/issues/171
# DEBUG := 1

# The ID of the GPU that 'make runtest' will use to run unit tests.
TEST_GPUID := 0

# enable pretty build (comment to see full commands)
Q ?= @

完成设置后, 开始编译

1
2
3
make all -j4
make test
make runtest

注意 -j4 是指使用几个线程来同时编译, 可以加快速度, j后面的数字可以根据CPU core的个数来决定, 我的CPU使4核, 所以-j4.

编译Matlab wrapper

执行如下命令

1
make matcaffe

然后就可以跑官方的matlab demo啦。

编译Python wrapper

1
make pycaffe

注意: 这里生成caffe 的 python 还不能够直接使用,建议输入下面的指令,将其加入到当前用户的用户变量中。

1
2
cd ~
gedit .bashrc

在打开的文件中,输入

1
export PYTHONPATH=/home/pi/caffe/python:$PYTHONPATH

保存后关闭,然后在命令行下输入

1
source .bashrc

打开一个新的终端或同时按住(Ctrl + Alt + T),输入

1
2
python
import caffe

如果看到如下内容

1
2
3
4
5
6
7
pi@DeepMind:~$ python
Python 2.7.6 (default, Jun 22 2015, 17:58:13)
[GCC 4.8.2] on linux2
Type "help", "copyright", "credits" or "license" for more information.
>>> import caffe
>>>

然后基本就全部安装完拉。接下来大家尽情地跑demo吧~

参考链接

转载务必注明 来自微记元-Ubuntu 14.04 64bit + Caffe + CUDA 7.5 + Intel MKL 配置说明